Homemade Peanut Butter Cups with Coconut Oil
Highlighted under: Simple Baking Collection
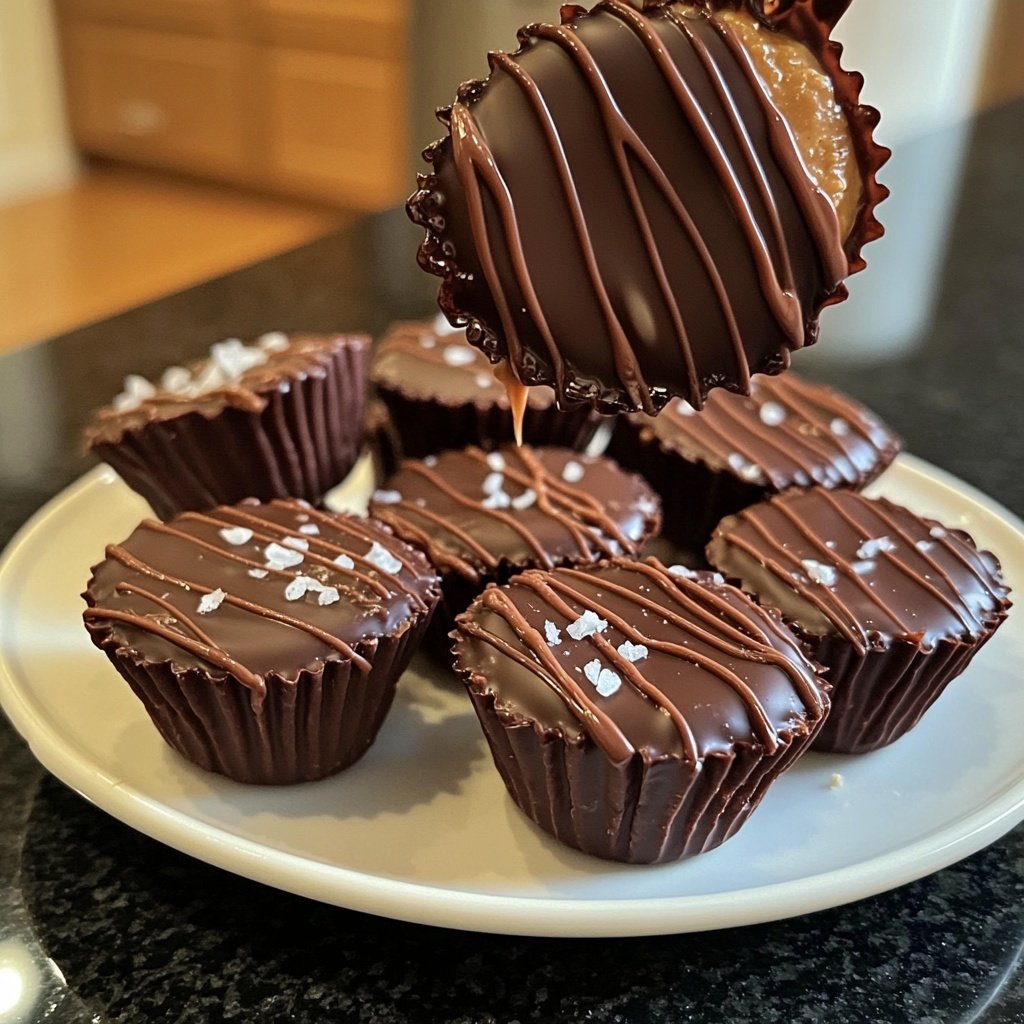
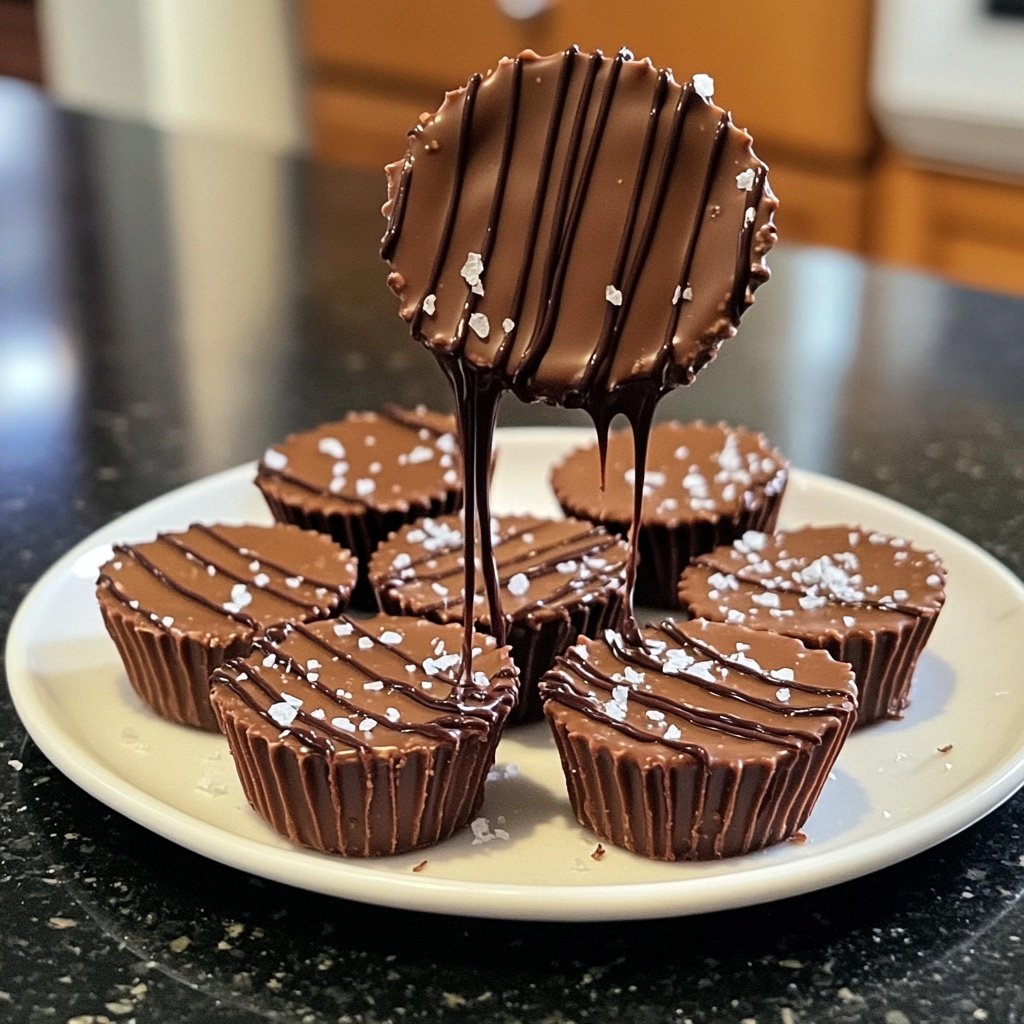
I absolutely love making my own peanut butter cups at home, especially with the addition of coconut oil. The combination of rich chocolate with creamy, naturally sweet peanut butter creates a treat that is both satisfying and indulgent. The coconut oil not only adds a delightful flavor but also helps to create a smooth texture that melts in your mouth. It's comforting knowing exactly what ingredients go into each cup, ensuring they are both delicious and healthier than store-bought options. These cups are my go-to for a quick snack or a fun dessert.
When I first tried making these peanut butter cups, I was astonished by how simple yet rewarding it was. The recipe was surprisingly straight-forward; just melt the chocolate and mix in some creamy peanut butter with a bit of coconut oil. The real secret is letting them chill in the refrigerator, which gives them that perfect, satisfying snap when you take a bite.
I enjoyed experimenting with different types of chocolate and ratios of peanut butter to coconut oil. Each variation taught me something new about flavor balance, and I found that adding a sprinkle of sea salt on top before chilling really elevated the taste. It’s a small touch that makes such a difference!
Why You'll Love These
- Rich chocolate coating that hardens perfectly
- Creamy peanut butter filling that is naturally sweet and smooth
- Infused with coconut oil for a delightful twist and health benefits
The Role of Coconut Oil
Coconut oil plays a pivotal role in both the chocolate coating and peanut butter filling of these cups. In the chocolate, it helps create a shiny finish that hardens perfectly when chilled. This not only enhances the visual appeal but also gives the chocolate a satisfying snap. When melted, coconut oil blends seamlessly with the dark chocolate, leaving you with a velvety consistency that coats the cups wonderfully.
In the peanut butter filling, coconut oil adds a unique richness and subtle flavor. It also contributes to a creamier texture, allowing the filling to become softer and more spreadable. If you're looking for a substitutable fat, you could opt for refined coconut oil if you want a neutral flavor or a different nut butter, but bear in mind that the texture may vary.
Tips for Perfectly Molded Cups
To achieve perfectly molded chocolate cups, it’s essential to let the first layer of melted chocolate set properly before adding the peanut butter filling. Make sure to keep an eye on the chocolate in the microwave, heating in 30-second intervals, stirring after each to prevent burning. When pouring the chocolate into the muffin liners, aim for an even layer that covers the bottom completely and goes slightly up the sides.
If you find the chocolate is too thick to pour smoothly, you can gently reheat it in the microwave for an additional few seconds. Alternatively, if your chocolate doesn’t set properly, it might not have been melted completely, or it’s possible the coconut oil wasn't incorporated well. In such cases, you can always remelt it and try again.
Storage and Variations
These peanut butter cups can be stored in an airtight container in the refrigerator for up to two weeks, making them a perfect make-ahead treat. If you prefer them extra firm, the freezer is also a great option, allowing you to enjoy a chilled snack right out of the container. Just remember to let them sit for a few minutes at room temperature to soften slightly before biting into them.
Feel free to get creative with the fillings! You can fold in crushed nuts, a sprinkle of sea salt, or even a drizzle of caramel for added flavor complexity. For a vegan version, simply substitute honey with maple syrup, and ensure your chocolate chips are dairy-free. Adjusting the sweetness is also easy; start with less honey or syrup, and gradually increase to taste.
Ingredients
For the Chocolate Coating
- 1 cup dark chocolate chips
- 2 tablespoons coconut oil
For the Peanut Butter Filling
- 1 cup creamy peanut butter
- 1 tablespoon coconut oil
- 2 tablespoons honey (or maple syrup for vegan option)
- 1/2 teaspoon vanilla extract
- A pinch of salt
Instructions
Steps
Prepare the Chocolate Coating
In a microwave-safe bowl, combine the dark chocolate chips and coconut oil. Heat in the microwave in 30-second intervals, stirring until completely melted and smooth.
Mold the Chocolate Cups
Pour a tablespoon of the melted chocolate into the bottom of muffin liners placed in a muffin tin, spreading it evenly. Place the tin in the freezer for about 10 minutes to set.
Make the Peanut Butter Filling
In a bowl, mix together the peanut butter, coconut oil, honey, vanilla extract, and salt until smooth and well combined.
Fill the Cups
Remove the muffin tin from the freezer and add a tablespoon of peanut butter filling to each cup, spreading it out gently.
Seal with More Chocolate
Pour the remaining melted chocolate over each filled cup until covered. Tap the tin gently to remove air bubbles and smooth out the top.
Final Chill
Return the muffin tin to the freezer for an additional 15-20 minutes until the chocolate is fully hardened.
Enjoy!
Pro Tips
- For an enhanced flavor, try using milk chocolate instead of dark, or add a sprinkle of sea salt on top before chilling. These cups can be stored in the fridge for up to a week, making them a perfect make-ahead treat!
Common Troubleshooting Tips
One of the most common issues when making chocolate cups is blooming, which causes a dull appearance. This can happen if the chocolate is heated too quickly or hasn’t been tempered properly. To avoid this, always melt the chocolate at low heat, and avoid any moisture when storing the finished cups as it can lead to texture changes. If bloomed chocolate is unavoidable, don’t worry; it’s still perfectly edible and safe to enjoy.
Another potential issue could be the peanut butter filling becoming too runny. This might occur if the coconut oil is added while too warm. To fix this, you can place the peanut butter mixture in the refrigerator for a short time to firm it up before filling your cups. An alternative is to use natural peanut butter that’s naturally thicker, which can help maintain the filling's intended consistency.
Serving Suggestions
These homemade peanut butter cups can be a delightful addition to any dessert table. For a visually appealing presentation, consider garnishing them with shaved chocolate, crushed nuts, or a light dusting of cocoa powder. They can also be paired with fresh fruit like bananas or strawberries for a refreshing contrast that balances out the richness.
If you are feeling adventurous, try incorporating different flavors into the chocolate coating, such as a hint of espresso or a dash of chili powder for a subtle kick. You could also roll the cups in crushed graham crackers before refrigerating for a s'mores-inspired treat. The possibilities are endless, and the base recipe is adaptable to many themes or occasions!
Questions About Recipes
→ Can I use almond butter instead of peanut butter?
Yes, almond butter works great as a substitute and adds a different flavor profile.
→ Is there a vegan option for the chocolate?
Absolutely! Look for dairy-free dark chocolate chips to keep the recipe vegan.
→ How can I make these sugar-free?
You can use sugar-free chocolate and substitute honey with sugar-free syrup or a sugar alternative.
→ Can I make these without coconut oil?
While you can skip the coconut oil, it helps with the texture. You might want to add a bit more peanut butter or a dash of vegetable oil instead.
Homemade Peanut Butter Cups with Coconut Oil
Created by: Serena Whitaker
Recipe Type: Simple Baking Collection
Skill Level: Beginner
Final Quantity: 12 cups
What You'll Need
For the Chocolate Coating
- 1 cup dark chocolate chips
- 2 tablespoons coconut oil
For the Peanut Butter Filling
- 1 cup creamy peanut butter
- 1 tablespoon coconut oil
- 2 tablespoons honey (or maple syrup for vegan option)
- 1/2 teaspoon vanilla extract
- A pinch of salt
How-To Steps
In a microwave-safe bowl, combine the dark chocolate chips and coconut oil. Heat in the microwave in 30-second intervals, stirring until completely melted and smooth.
Pour a tablespoon of the melted chocolate into the bottom of muffin liners placed in a muffin tin, spreading it evenly. Place the tin in the freezer for about 10 minutes to set.
In a bowl, mix together the peanut butter, coconut oil, honey, vanilla extract, and salt until smooth and well combined.
Remove the muffin tin from the freezer and add a tablespoon of peanut butter filling to each cup, spreading it out gently.
Pour the remaining melted chocolate over each filled cup until covered. Tap the tin gently to remove air bubbles and smooth out the top.
Return the muffin tin to the freezer for an additional 15-20 minutes until the chocolate is fully hardened.
Extra Tips
- For an enhanced flavor, try using milk chocolate instead of dark, or add a sprinkle of sea salt on top before chilling. These cups can be stored in the fridge for up to a week, making them a perfect make-ahead treat!
Nutritional Breakdown (Per Serving)
- Calories: 200 kcal
- Total Fat: 15g
- Saturated Fat: 5g
- Cholesterol: 0mg
- Sodium: 10mg
- Total Carbohydrates: 17g
- Dietary Fiber: 2g
- Sugars: 8g
- Protein: 4g